Raspberry Rhubarb Bars

DSC02991Raspberry and rhubarb.  How is it that bountiful gardens are blessed with rhubarb bounties for five months straight, and that our ever-bearing raspberries burst into perfect pink fruition twice during that glorious span? Now deep into September, my second blooming of raspberries is a couple weeks gone, but my freezer is full-to-bursting with yogurt containers full of the sweet fruit, and my rhubarb is still going strong, even after the fall equinox has turned our Northern hemisphere tilting toward darker days.

This girl’s not complaining yet though.  The garden still is colorful with chard and kale, the mums and nasturtiums keeping the bees entertained on sunny days, and the grass has regained some of its verdancy but requires little mowing. Indoors, the approaching winter begs for a warm oven full of steaming baked goods and a stove topped with simmering soups, and I’ll gladly be complicit in answering the call to my kitchen.

This recipe came from my grandmother’s recipe box, though the original recipe was for rhubarb only, so I’ve added in the raspberries.  As well, in this recipe I have replaced the sugar with honey (I haven’t played with this in all of my recipes yet, but this one I have locked down).

DSC03509While I’m baking, I’m listening to Foals’ Antidotes, the 2008 release that turned me on to my favorite band of the last decade. The album is high-energy, post-punk put out by a UK band, with a playful guitar that alternates between playful picking and the whammy bar. Yannis Philippakis’ vocals are clean and short, without being whiny or drawn out, and Jack Bevan’s drums are tight and driving, keeping Foals feeling dancey even on their slowest tunes. I dig.

Ingredients:

  • 12 cup butter at room temp
  • 1 1/5 cup honey split into 2/5 cup, and 3/5 cup (or 1 cup sugar)
  • 2 large eggs (separated into yolks and whites)
  • 2 1/4 cups  all-purpose flour (this can be cut to 2 cups when using sugar)
  • 2 teaspoons baking powder
  • 14 teaspoon salt
  • 12 cup coconut milk (goat milk or traditional dairy is fine as well)
  • 2 cups chopped rhubarb
  • 2  cups fresh raspberries (2 12 cups frozen raspberries will do as well, but make sure to blanch thoroughly)
  • 1 teaspoon vanilla
  • 2 tbsp evaporated cane sugar

Directions:

  • Heat the oven to 350°, and grease a 9″ x 13″ glass baking pan.
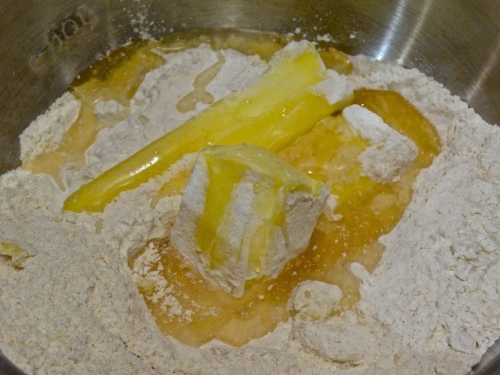
  • Using an electric mixer, cream butter, 2/5 cup honey, flour, baking powder, and salt together. DSC02978
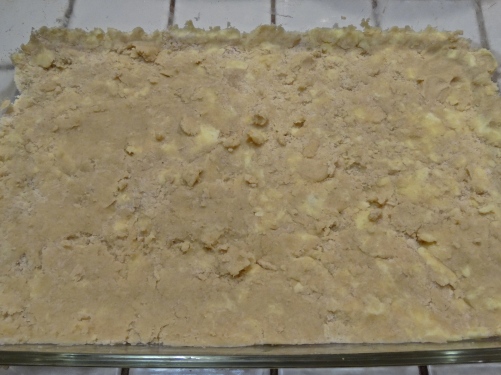
  • Using fingers, press mixture into the bottom of the baking pan, spreading as evenly as possible, and then bake for ten minutes. DSC02979
  • In the meantime, separate egg yolks from whites.  Set whites aside in a small-medium bowl.
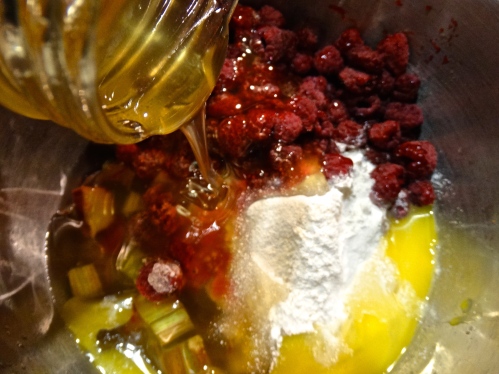
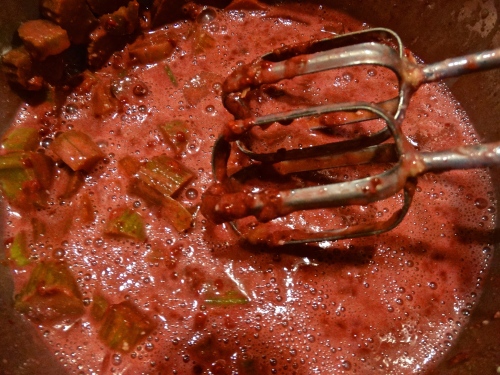
  • Mix together egg yolks, coconut milk, raspberries, chopped rhubarb, honey, and vanilla. DSC02984
  • DSC02985
  • Remove crust from the oven, and let cool for ten minutes, before pouring raspberry rhubarb mixture on top.  Bake for 40 minutes.
  • Remove from the oven and set aside.
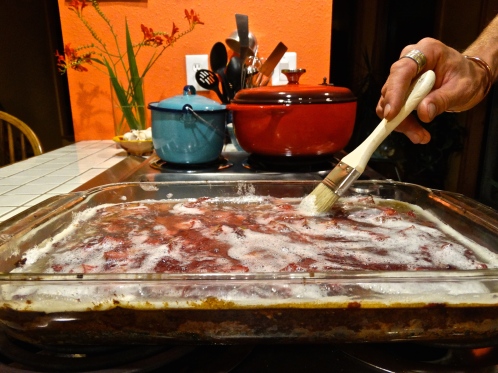
  • Whip together egg whites and 2 tbsp. sugar until frothy.  Using a pastry brush, paint rhubarb raspberry bars with egg whites. DSC02989
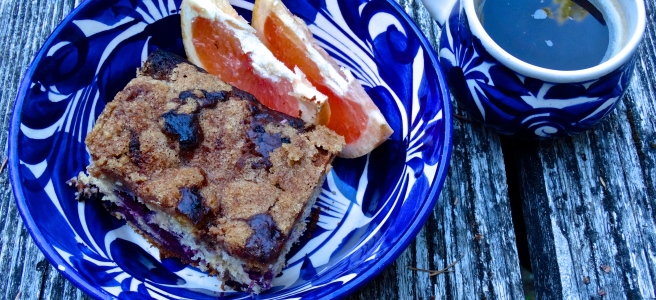
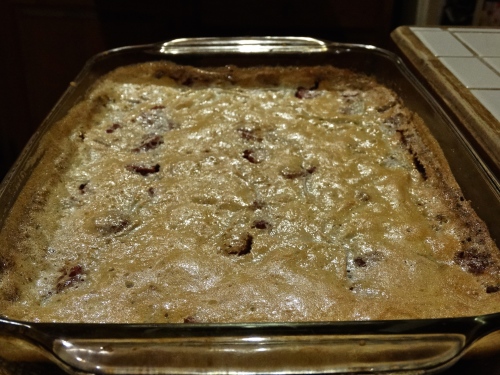
  • Return to oven for an additional 10 minutes. The egg white topping will harden and brown slightly. Remove from oven, and let cool 10-15 minutes before cutting. DSC03270
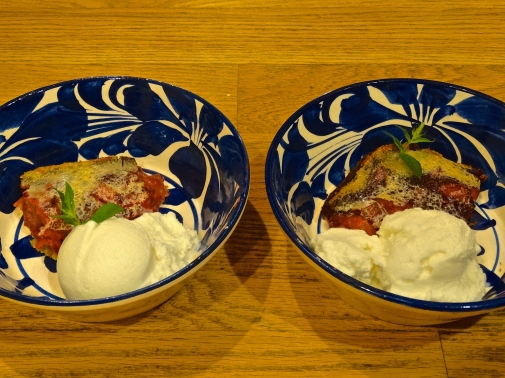
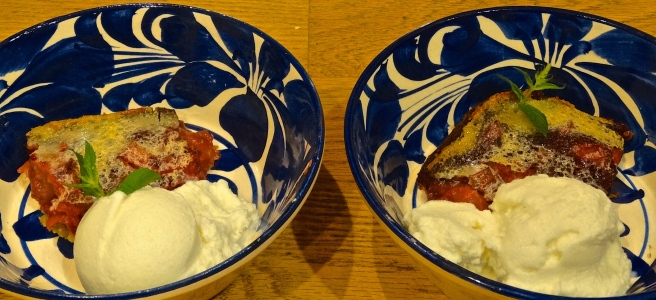
  • Serve warm with vanilla ice cream or fresh whipped cream, and a spring of mint for garnish.DSC02991

Creamy Carrot and Thyme Soup

I have a slight obsession with soup. It hasn’t shown itself yet, as I tend to back off the soup fetish in the summertime, but now that the mornings are getting crisp and the leaves are beginning to chance, my soup craze kicks in.

Luckily, I have the perfect recipe book to give me some inspiration. It’s not actually an official publication, but rather a recipe book that I received for making a donation to Sacred Heart Shelter, with forty seasonal soup recipes (ten per season) that were each shared by a local Seattle chef.

Now, most of the soups are too fancy for me. I try to keep it basic – partly for quickness, but mostly because I only drive the one hour each way to a grocery store once every three weeks or so and load up like I’m stocking for Armageddon. Looking for a bunch of specialized ingredients isn’t high on the priority list.

Despite the intimidation-factor of most of the soups, I’ve simplified a few of the recipes to make it work for items I have on hand at the house.  While I’m cooking, in a mellow mood, I’DSC03512m listening to the dreamy pop of Beach House’s Bloom, the duo’s fourth album released, put out by Sub Pop, and the first album to consistently introduce actual drums into their recorded sound.  The title Bloom is fully appropriate for the evolution of this band’s sound and ideas.

Yum on many levels. So here it goes.  Creamy carrot soup with thyme.

Ingredients:

  • 12 cup olive oil
  • 1 large sweet onion, peeled and diced
  • 2 tbsp. fresh thyme, removed from stems and chopped DSC03135
  • 4 lbs carrots, cleaned well and rough chopped
  • 8 cups vegetable stock (I usually use 8 cups of warm water and 8 tsp. of Vogue’s instant “VegeBase,” or I use some of my own polypore vegetable broth)
  • 1 cup half and half
  • salt and fresh ground pepper to taste
  • (optional) 6 oz. Camembert, Gorgonzola or ripened brie with rind removed, to melt as drizzle for presentation

Directions:

  • Combine olive oil, onions, and fresh thyme in a large soup pot, and cook over medium heat for approximately ten minutes, until onions are soft and semi-transparent. DSC03131
  • Add carrots and vegetable stock (or in my case, water and vegetable stock replacement), and cook gently for about twenty minutes, until carrots are soft.DSC03136
  • Using an immersion blender (or in small batches in a standing blender or food processor), blend one or two minutes, until soup is smooth and creamy.
  • Add half and half, salt, and pepper to taste.
  • Ladle into bowls and serve.DSC03137
  • (optional) garnish with a sprig of fresh thyme
  • (optional) garnish with melted Camembert, Gorgonzola, or brie that has been melted in a small pan over low-heat, and drizzled into each bowl. *The Gorgonzola has become a personal favorite, as I always have it on hand, and I love the lift it gives to the soups flavor.

Simply, healthy, and satisfying, this soup can be a staple on your table anytime carrots are in season – from late spring, well into the fall.

Layered Blackberry Buckle

Two confessions.

  1. This is an adaption of a blueberry buckle from my mom’s collection that I adapted for not-quite ripe blackberries (sorry mom)
  2.  I’m an entirely overly-aggressive blackberry picker.

DSC03111The latter one is a problem.  Every time I get out there to pick, even it 90 degree weather, I always have to wear long sleeves, pants and boots.  Somehow I always end up in the thicket, Warrior 3/Virab 3-ing my way to blackberries that Are just out of my reach, hands and wrists cut and dripping with juice, and generally with hamstrings that feel taught and near-pulling.

I don’t know why I do this.  Instead of picking all the easiest to reach fruit (far quicker and more practical), I thoroughly attack an area, obsessed with getting every single berry in my reach – standing on my car, jumping in the thicket, or crawling on the ground to do so.

I tell myself it is so the berries won’t be wasted. However, since no one picks in our area, there are always thousands of berries wasted, and really, I’m just wasting time and hurting myself.  Yet I can’t stop.  YOU GUYS, I have a blackberry picking problem. (But at least you know in life, I’ll never go after the lowest hanging fruit… ba-dum-CHING!).

DSC03507

While I worked on this treat, I listened to Neil Young’s Harvest (a precursor to Young’s later album, Harvest Moon).  The incredible Harvest Moon/Super Moon was just last month, and many of us were out there staring at the young nighttime sky, patiently witnessing the Supermoon Lunar Eclipse.  It was special.  We went out and felt the night… and now I’m listening to Neil Young’s 1972 album, (which went on to be the top-selling album in the unites States for the year), swaying and misty eyed, baking while the moon climbs high.

DSC03513

Here’s blackberry buckle.  This is equal parts dessert and coffee cake.  And I LOVE it when I can eat my dessert for breakfast. Mmmm.

Ingredients:

  • 12 cup butter at room temp
  •  1/2 cup sugar (next time I’m going to try 1/3 cup honey and less yogurt)
  • 2 large eggs
  • 1 teaspoon vanilla
  • 1 teaspoon baking powder
  • 1/4 tsp baking soda
  • 14 teaspoon salt
  • 1 1/4 cups  all-purpose flour (I use a mix of 1/3 wheat and 2/3 white)
  • 12 cup plan yogurt
  • 1 cup firm blackberries (or you could revert back to the original and use blueberries). *Frozen berries will do as well, but make sure to blanch thoroughly.
  • 1/2 cup brown sugar
  • 1 tsp. cinnamon
  • 1/2 tsp. nutmeg
  • 1 cup chopped walnuts
  • 2 tbsp. butter (keep cold)

Directions:

  • Heat the oven to 350°, and butter and flour a 8″ x 8″ glass baking pan.
  • Using an electric mixer, cream butter and sugar (or honey) together.
  • Add in eggs and vanilla and beat thoroughly.DSC03094
  • In a separate bowl, combine flour, baking powder, baking soda, and salt.
  • Once mixed, add dry ingredients to creamed mixture and blend.
  • Blend in yogurt.
  • Gently stir in berries (be especially careful with blackberries, as they can break open and bleed easily, changing the color and character of the cake).
  • Pour 1/2 of the cake batter into baking pan, preserving the rest for the second layer.
  • For the topping, in small bowl mix the brown sugar, cinnamon, nutmeg, and walnuts.
  • Take half of the this topping, and sprinkle on top of first cake layer.
  • Add remaining batter.  (Look ma! We’re making layers!)
  • Cut in the cold butter into the remaining brown sugar mix.  Break into crumbles with hands, and then sprinkle on top of cake. DSC03096
  • Bake for 40-45 minutes at 350 degrees.

Drink with black coffee in the morning on a back porch in the sunshine, and don’t feel guilty. It has fresh fruit, remember? DSC03113

Spicy Beans Pickled with Apple-Cider Vinegar

DSC02941I LOVE the ingredients in this recipe, in that essentially everything in this pickled variety grows in my garden or is a product of the home.  I’m especially pleased about the apple-cider vinegar used as the pickling agent, and honey used as the sweetener. (Have you read yet about how we make our own apple-cider vinegar here at the homestead? Well we do, and I’m apple-cider vinegar obsessed.  Consider yourself now warned).

I came across this recipe on Pop Sugar (here), and aside from the presence of both apple-cider vinegar and honey, I was lured by the promise that these are the perfect Bloody Mary addition. Although Bloody Marys are a rarity in my now-mellow mountain life, they maintain a staple beverage in an annual rafting trip my partner and I make on the Deschutes every August with friends, and these pickled green beans are now on the car camping accoutrement list.

To ensure a crisp pickled bean, pick your beans directly before beginning the pickling process.  If you pick your beans five days prior (*clears throat), wash them with every intent to pickle that afternoon, and then the next day, and then the next… and finally pickle them five days later, the end result is that the texture of the pickled bean will suffer.  I might know a well-intentioned but often-busy person who thankfully, has made this mistake for you. In case you need a reminder, fresh is always best.

While I’m whipping up this spicy vinegar DSC03797base, I’m listening to Matt and Kim’s Grand, because I’m in a silly, booty-shaking mood. Grand is the second album from this Brooklyn-based duo, a pop/punk/electro dance party that dares anyone listening not to bop around to the shouty singing, aggressive drumming, and blaring synthesizers.  Woohoo!

This ingredient list is per jar, so multiply the ingredients based on how many beans you’ve gathered.  If your garden is plentiful, go crazy, and give these jars out for holiday gifts, attaching a recipe for a fantastic Bloody Mary on the jar label. Tell all your friends to thank me later.

Ingredients:

  • 18-20 green beans, washed and cut to fit to mason jar
  • 3/4 apple-cider vinegar
  • 1/2 cup water
  • 1 tsp. five-pepper blend peppercorn
  • 1/2 tsp. crushed red pepper flakes
  • 1/2 tsp. whole coriander
  • 1/4 tsp. dill weed (dried or fresh)
  • 1-2 bay leaves (we keep a bay laurel plant potted in the kitchen for fresh bay leaves whenever we please)
  • 2-3 cloves of garlic, pounded once
  • 1/2 tsp. salt
  • 1/2 tsp. honey

DSC02942Directions:

  • Sterilize mason jars and lids by submerging in a pot of water, bringing to a boil, and boiling for at least twelve minutes.  Use tongs to remove the jars (careful – they are hot!), and place on a clean towel to await ingredients.  Keep the pot of water on the stove to complete the jarring process later.DSC02950
  • Place green beans into the mason jar.
  • Add all other ingredients to a saucepan and bring to a boil, reducing to low and simmering for five minutes before using a funnel to pour the brine over the green beans, leaving 1/4″ of space at the top of the jar.DSC02944
  • Place a new canning lid on the jar, and screw on the band firmly.
  • Take the jar of green beans, and place them into the pot of water, submerging by at least two inches. Bring to a boil, and boil for at least ten minutes.DSC02951
  • Remove jar from boiling water using tongs, and place in a cool, dark place to pickle.  Listen for the lid to pop on the jar as the jar cools the first few moments after being removed from the hot water, signaling a proper seal.  *If jar does not seal, you may eat within five days, but the beans won’t have finished the pickling process within that time, and thus won’t be as flavorful.
  • Pickled beans may be enjoyed after 5-7 days, or can remain in storage indefinitely in a cool, dark place.  Once open, refrigerate and eat within two weeks.

DSC02955Eat them straight, or of course, dress up your Bloody Mary with these spicy babes.